Español
 Francés
 Deutsch
 Русский
 العربية
 Português
 日本語
日本語
 한국어
한국어
 Italiano

How to Install and Maintain PVT Solar Systems for Long-Term Performance
How to Install and Maintain PVT Solar Systems for Long-Term Performance
Installing a PVT system isn’t just about putting panels on a roof — it's about connecting two energy systems that must work in perfect harmony.
PVT systems are growing in popularity, but many installers and building managers underestimate the installation and maintenance complexity. Improper setup or neglected upkeep can drastically reduce system efficiency. If you want long-term performance and real ROI, proper installation and maintenance are critical.
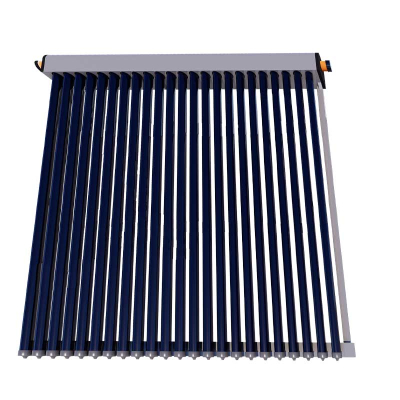
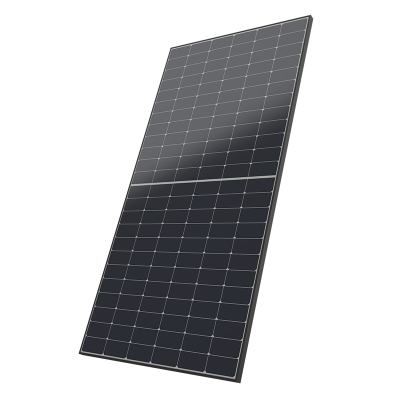
PVT systems require integrated installation of photovoltaic electrical components and thermal plumbing. This includes mounting hybrid solar panels, wiring the inverter, connecting insulated piping to a thermal tank or heat pump, and installing flow control units. Regular maintenance includes flushing the thermal circuit, checking for air locks, and cleaning the panel surface.
Below is a complete guide to help you or your installer get the most from your hybrid solar system.
How do you install PVT solar panels?
Installing PVT panels involves both photovoltaic and solar thermal tasks. Here's a step-by-step process:
Mount the PVT Panels: Use racking systems designed for hybrid panels. Ensure correct angle, orientation, and sufficient structural support due to the added weight of thermal elements.
Connect the PV System: Wire the PV portion to an inverter, ensuring standard grounding, string configuration, and disconnect safety procedures.
Install Thermal Circuit: Use insulated piping to connect the heat exchanger in the panel to a hot water tank, buffer tank, or heat pump. Use glycol or antifreeze fluid for cold climates.
Add Flow Management: Install a circulation pump, temperature sensors, flow meter, and a control unit to optimize heat transfer and prevent overheating or stagnation.
Pressure Test and Insulate: Check for leaks, ensure proper fluid pressure, and insulate all exposed pipes to prevent heat loss.
[Download standard PVT installation schematic →]
What tools and components are needed for PVT installation?
Unlike PV-only systems, PVT installation requires plumbing equipment alongside electrical tools.
🔧 Tools You’ll Need:
Mounting hardware and racking tools (wrenches, drills)
Multimeter and insulation testers for PV safety checks
Pipe wrenches, cutting tools, thermal sealants
Vacuum pump and pressure gauge for thermal system
🔩 Key Components:
Hybrid PVT panels (with thermal exchangers)
Inverter and junction box for the electrical side
Circulation pump (variable speed preferred)
Heat exchanger or buffer tank
Temperature sensors + control unit
Insulated piping and antifreeze liquid
[Full component list for commercial PVT systems →]
How often do PVT systems need maintenance?
PVT systems require low but regular maintenance. Properly maintained systems can last over 25 years.
🗓️ Recommended Maintenance Schedule:
Every 6 months: Inspect panel surface for dirt, leaves, bird droppings. Clean with soft cloth and water.
Every year: Check fluid pressure, inspect pipe insulation, test temperature sensors.
Every 2 years: Flush and replace antifreeze or heat transfer fluid (especially in cold climates).
Every 3–5 years: Service circulation pump and electrical connections.
Many PVT issues stem from neglected thermal loops. Regular inspection can prevent performance losses of up to 20–30%.
What are common issues with PVT systems?
Understanding frequent failure points helps you prevent breakdowns before they cost you energy and money.
⚠️ Typical Problems:
Air bubbles in the thermal loop: Reduce heat transfer efficiency. Bleed the system regularly.
Stagnation overheating: Occurs if fluid isn’t circulating. Avoid with sensor-based controllers.
Insulation degradation: Outdoor pipe insulation cracks or degrades, causing heat loss.
Inverter issues: Similar to PV systems — monitor status lights or online diagnostics.
Scaling or blockage in exchanger: Use filtered fluid and periodic flushing to avoid mineral buildup.
Tip: Install an automated monitoring system to alert you to faults in real-time.
What is the difference between installing PV and PVT systems?
The main difference lies in the thermal system integration. While PV panels require only electrical installation, PVT adds:
Fluid piping and pressure management
Temperature and flow sensors
Thermal control unit configuration
More roof load per square meter (due to the heat exchanger weight)
Installers must understand both electrical codes and plumbing standards — or work with a team that combines both.
Can commercial buildings install PVT systems easily?
Yes — and in fact, commercial rooftops are ideal due to their larger area, higher energy demand, and access to existing HVAC systems.
🏢 Best practices for commercial PVT installs:
Use modular panel arrays with separate PV and thermal lines
Integrate into BMS (Building Management System) for smart control
Ensure structural load testing before mounting heavy panels
Pre-plan plumbing routes from roof to mechanical room
On high-rise or complex buildings, external support (e.g. scaffolding, facade piping) may be needed.
How do you maintain solar thermal components?
Solar thermal systems (the “T” in PVT) need more care than PV. Here’s how to keep them running smoothly:
Check antifreeze annually: Test for acidity, degradation, or leaks
Flush exchanger plates: Use cleaning solution to remove scale every 2–3 years
Check and replace pump seals: Vibrations can cause wear over time
Inspect insulation: Replace cracked or UV-damaged insulation jackets
Conclusion: Smart setup = long-term savings
PVT systems combine two technologies — solar PV and solar thermal — into one high-performance solution. But their success depends heavily on proper installation and maintenance.
If you’re planning a commercial or large-scale residential install, work with qualified professionals and follow a strict service schedule. Your panels — and your utility bills — will thank you.